
By Kathleen Julicher
Science is the study of the universe, but you don’t have to study it all at once, or even several parts at once. Just work on one question, like “How fast can my dog run?” By using the scientific method and a worksheet like the ones included at the bottom of this post, you can perform an experiment which will give your student a technique to use on later questions. (Do you need some examples of Questions For Young Scientists to Ask? Check this blog post!) By collecting worksheets into a science notebook, you will have a record of your student’s scientific investigations.
Use the worksheets with science activities from other books. Use different sheets with children of different ability levels when you are teaching an integrated unit study.
I have broken the scientific method down into outlines for different ages.
At each age you may expect more from your child. At each level, they will be able to increase their thinking skills and well as their process skills. Since the scientific method is both a process and a pattern of thought, you will be giving your child a system for problem solving of any type.
2 – 4 years (pre-writing)
- Observations dictated to mother
- Drawings
- Conclusions – your students will think them, but do not require it. Just let them think.
Children at this stage do learn a lot of scientific principles, but not because they have been taught from a text. For example, observe the principles of gravity. The young child does know that what goes up, must come down. About the time when he was 12 months old, he used experimental evidence to demonstrate that when he dropped something, it fell. In this way, your toddler is learning real science.
When you use the scientific method as a guideline, you will add a system to the haphazard learning of a child. You will also be teaching thinking skills.
You can ask them to tell what they see or hear or smell. This is developing their observational skills, a necessary part of the scientific method. Let them draw, but have them dictate labels to you so that you can write them down.
5 – 7 years (learning to read and write stage)
- Observing
- Measuring
- Drawing
- How-to skills: planting, building with toys.
These children are ready to start “doing science”. (As if they could be stopped.) This is skill-building time. Some useful skills are drawing, measuring with better accuracy, making lists of(or dictating) observations, planting food plants, and building bridges, cars, etc. They still will be making conclusions, but you don’t need to require it.
When you use the scientific method with this age group, you can let them try more on their own. They can start writing their own labels on the drawings and lists of materials. If you use a form like the one here, let them dictate it to you if their writing skills are still developing. Require dates and page number on their reports, though. Let them copy pictures from a book onto the drawing paper.
8 – 10 years
- Guessing
- Learning to predict
- Measuring
- Drawing
- Observing
- Graphing
- Drawing conclusions
- Explaining why
- More building (add motorized projects)
This stage is the time to perfect the skills of observing, measuring, building, and drawing. Now, the children have better coordination for these tasks. Have them measure everything: temperature, wind speed, number of bounces, weights, volumes, etc. Have her copy drawings from books: arches, columns, faulting, types of fishes, bird beaks, zones of the Earth, etc. Label everything. I would not expect that you have a text for the student yet, but you should have advanced volumes available for you to read to her. (By advanced volumes, I mean junior high texts or above)
When a young child is studying with the scientific method, it is not necessary to do a whole experiment. Break the parts down and just have your student draw a diagram, or play with the measuring cups so that he/she can determine how much lunch is on the plate. (Don’t forget to record the lunch volume in your science notebook.) Doing only parts of the scientific method is especially good for the really young science students.
Sometimes, you should let your child do an experiment when you are not in the room. He should then give an oral report telling: what he did and what happened. Your job will be to take notes and place them in the science notebook.
By using the scientific method in this way to teach science, you are giving your student a set of tools which can be used in other areas besides science. In addition, by breaking down the scientific process into small skill-oriented topics, you have made science easier to grasp.
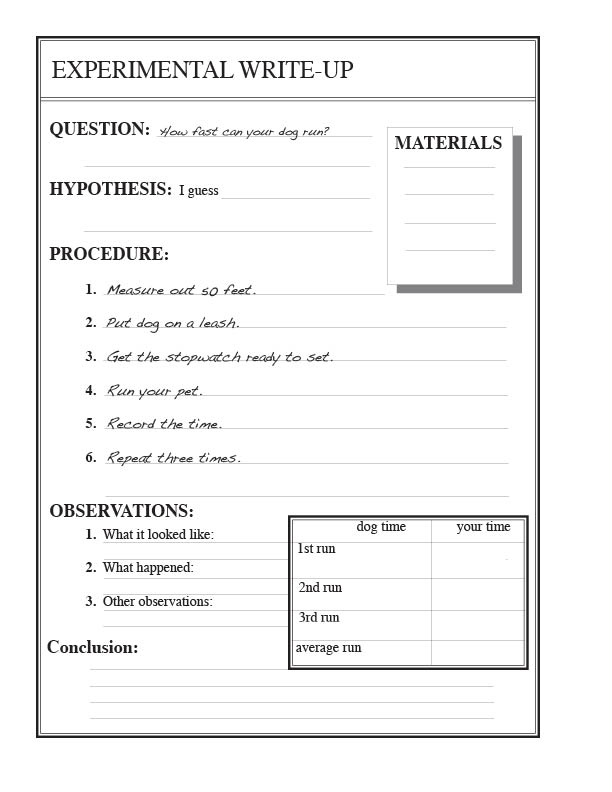
Here is a simple sample writeup below: