Architecture combines art, engineering, and construction. Usually taught as an art, even in universities, architecture has its roots in engineering. Architecture involves the creativity and precision of making a static structure into something functional as well as pleasing to the spirit.
The youthful study of architecture usually begins with Legos, or Lincoln logs, or just blocks. Just as the toddler learns about Newton’s Laws by struggling to walk without falling, the young engineer learns to build by building. Play with blocks is not only recreation, but like playing with paper airplanes, it can be very educational. When your child plays with blocks, do not guide the play or suggest too many things. To do this would tell your child that his or her ideas are no good, and that building is boring. Just let your child play with the blocks.
For the activities described in this article, let your child play with the activities and invent new ones. The purposes for practice building are to develop a love and understanding about building, to encourage creativity, and to discover some techniques used in past ages. All of these are most fun when done through play!
Baked Clay Bricks
The projects presented in the rest of this article use bricks that can be constructed with potters’ clay. A good sized block of clay can be purchased inexpensively at most craft stores and stored for months or even years in a plastic trash bag. Every home school can derive great benefit from a block of this most useful stuff. An unconfirmed rumor has it that some homeschoolers even use it to make pottery!
- Take clay and roll it out onto a cookie sheet with a rolling pin. The clay sheet should be about 3/8 to 1/2 inch thick. Roll it until it is a uniform thickness and smooth on the top.
- With a knife, cut the clay into small squares, about 1/2 inch by 3/4 inch in dimension. Separate the bricks a little using the knife.
- Bake the bricks into hard clay by using the self-cleaning function of an oven. This is not as hot as firing in a kiln, but it does produce a nicely functional brick for your projects. One hour is enough time.
Walls of Jericho
In the ruins of Jericho, huge walls have been found. Read the story of the fall of those walls in Joshua 6.
According to Max Schwartz , a typical Bronze Age fortress wall, such as Jericho, was made of stone, brick, and earth. The wall would be about nine feet tall and four feet wide. For additional strength and protection a glacis, (a steep slippery berm), was built against the outside of the wall. The glacis was designed to keep potential attackers under the fire of the defenders as long as possible.
You can build a fortress wall using clay bricks. The buildings and walls of Jericho were of sun-baked bricks. Sun-baked bricks are not as strong as fired bricks, but when supported by many layers of brick and faced on the outside with a glacis, the walls would be strong.
In the ruins of Jericho, the walls were built of bricks set with the longitudinal axis perpendicular to the run of the wall. Such a design would make a stronger wall than one in which the bricks were lined up lengthwise.
After your wall is built, you might try an earthquake and see what effect it has on the wall. You can do this by shaking the table on which your model sits.
Making the Walls of Jericho
- Make a paste of some unfired clay and water. This will serve as mortar. After it is dry, it will be strong enough for your model, but not as strong as real mortar.
- Lay a thin, straight line of clay on a piece of poster board. This will be the bottom of your Jericho wall. Press a row of bricks onto the clay. Lay the bricks widthwise, in other words, side-by-side and not end-to-end. Top the first course of bricks with more clay mortar. Press another row of bricks into the clay. Be sure to stagger the bricks so that the top brick covers the crack between the two lower bricks. Staggering the bricks makes the wall stronger. Continue in this fashion until you have five or six courses of bricks vertically. Now double the width of your wall by building a second wall right beside first wall.
- When the wall is done, make a glacis by stirring pebbles and clay mortar together into a thick mixture (for an excellent depiction of a glacis and more on the archaelogy of Jericho, consult this Answers in Genesis site).
- You are going to apply a glacis to your wall just like a frosting on a cake. Plaster the pebble and clay mixture along the outside of your wall. Make it about a half-inch thick. Finally, spread clay paste over the pebbles so that the wall is smooth on the outside. Let dry.
Imagine how the men of ancient Jericho could stand on their wall and believe they were protected from invading armies!
Roman Arches
The arches of Rome allowed Roman engineers to build high aqueducts and bridges that used less material but still bore the weight of the structure well. Some of these constructions are still in usable condition after 2000 years.
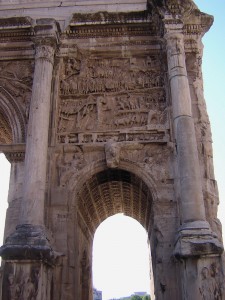 The building materials of the Romans were brick, concrete, stone, and wood. [amazon_link id=”0399300015″ target=”_blank” ]Talbot Hamlin[/amazon_link] describes Roman bricks as 1 or 2 feet square and one to one and one half inch thick, almost a large tile. These must have been fired bricks.
Whole walls were built of these bricks. Occasionally, when a cheaper material, like concrete was to be used, the brick were cut diagonally and laid with the diagonal side in the wall with the corner extending back into the wall fill. This would divide by half the number of bricks used and make a nice looking facade of brick.
Concrete was made by the Romans and is still said to be the best in the world. Sand, small stones, and cement material from volcanic rock was used to make concrete which still stands. Formwork was made out of wood and then later removed much as we do today when making concrete structures.
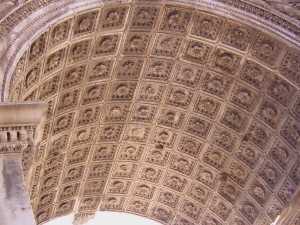
The vault and arch construction developed by the Roman engineers is said to be Rome’s greatest contribution to construction engineering. The wide arch, or vault, can be hard to build because it must be supported until construction is finished, but once finished, vaulted arches are graceful and strong.
Roman bridges often used arches, as we do today, because arches did little to interfere with the flow of the river and still supported the roadbed. An arch allows a long span to be covered— yet it can still carry heavy weight. Weight on the top of the arch is transmitted sideways down the curvature of the arch to the pillars.
This caused a problem that the Roman engineers had to solve.
Pillars, like other cylinders, are great at supporting weight as long as it is transmitted straight down. An example of this is a straw, which is very strong in the lengthwise direction, but not at all strong when subjected to a sideways force. The sideways force on the pillars of the arch will push the pillars outward away from the arch and cause the structure to fall unless the pillars are supported by something extra.
So, the Romans learned to use buttresses to support the pillars. The first buttresses, or supports for the wall, were merely very thick extensions to the walls. Later, Roman engineers realized that solid brick buttresses were not necessary, so recesses and niches were cut out of the buttresses to reduce the heaviness of the wall.
To make your arch easier to build, you may wish to use a form to hold your arch steady until construction is done.
Making Roman Arches
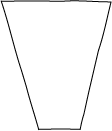
The arches of Rome had thick bases of brick and tall pillars capped with brick semicircles for arches. The bricks in the curve of arch must be slightly wider than the normal brick. They may also be shaped like wedges to make the arch building a little easier.
- Make the arch bricks shaped this way when viewed edgelong. Use the brick instructions above and shape your brick with a knife to achieve the correct shape
- Draw two squares on a small piece of poster board or cardstock, approximately two inches on a side. Make the squares two inches apart. These are the footprints of your arch.
- For your arch, you will make two support pillars that will take the weight of the arch and whatever may be traveling over it. The pillars will be boxes two inches tall, two inches deep, and two inches wide. You make them by spreading a layer of clay paste on the boxes you have drawn on the poster board. Set a row of bricks around the square and cover with a layer of soft clay. Repeat the laying of bricks by rows alternating with soft clay until your pillar is two inches high.
- The Romans used a formwork to assist in constructing the arch itself. Make your own formwork by cutting out a cardstock arch to span the pillars.
- Carefully, use some clay to stick your poster board arch forms across gap between the support pillars.
- Build the arch over the formwork, placing the bricks tightly and carefully so that the narrow edges of the bricks are on the inside of the arch. Use clay paste as mortar between the bricks of the arch.
- When the arch completely spans the distance between the pillars, carefully place a layer of soft clay on top of the arch. Lay in a layer of bricks across the top for a pavement. Let dry. Remove the formwork.
Pueblo Houses
The P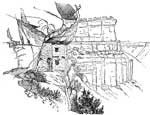 ueblo Indians had a problem. How to make a home that was quickly built, long lasting, and easily defended? Clay was available, as were rocks. Lumber was also available but it was not plentiful. There were not many large trees where the Pueblo Indians lived.
The cliff houses of the Pueblos have stood the test of time even though the inhabitants are no longer living. The Indian builders used several different techniques: wattle and daub, rock and clay, and brick and clay walls. Some of the houses were made with sun-dried bricks while others were built out of rock.
Non-load bearing walls were constructed from wattle and daub. This technique incorporates a woven lattice of vines and sticks across the area to be walled. The lattice was then covered with clay or mud and allowed to dry. A similar construction technique is found in walls of lath and plaster.
Doorways used lintels at top, sometimes made of wood, sometimes of the same material as the walls. A lintel is a horizontal structural member that spans an opening, as between the uprights of a door or window.
Across the top of the roof, you will need to place twigs, representing the vegas of the pueblo houses. Your vegas will support the second story of the house. In the roof of the first floor you will need a hole in which you will place a twig to serve as a pole ladder. This is the way that the Indians went upstairs.
You may use pebbles and clay or your fired bricks and clay, as well as twigs of different sizes to build a model of a Pueblo cliff house. You can use clay bricks or small gravel rocks to build the house.
Making Pueblo Houses
- On a piece of poster board, draw the outline of the floor plan of your house. Make the scale one half inch to the foot. Think about incorporating one ceiling ladderway, a wattle and daub wall, vegas supporting the room above, and lintel doorways. When you complete this structure it will be about nine inches tall.
- Lay a bead of soft clay on the outline of the floor plan. Lay bricks, or rocks, on the clay bead and press down so that the brick is embedded into the clay. Lay another row of clay and another of bricks. Stagger the bricks so that they are not lined up one directly over the other. Be sure to use plenty of mortar. Let dry.
- When your exterior walls are about four or five inches tall, you are ready for the interior wall. Lay a thick bead of clay down across the floor where the wall is to be. Do not put clay where the doorway will go. Lay a small stick across the walls of the house directly above the bead of clay. The rest of the interior wall construction will be to make a miniature wattle and daub wall between the clay bead on the floor and the twig vega along the ceiling. Stick small twigs upright into the clay. Tie the twigs to the vega above them with string. Make a clay paste about the consistency of mud. Smooth the clay out over the twigs forming a clay-covered wall. Repeat on the other side of the wall.
- Place long sticks at about two inch intervals across top of the walls to form the roof vegas. Lay shorter, smaller twigs across the vegas to form a ceiling. Do not forget to leave a hole in the center of one of the rooms for the ladderway. You must lay a couple of short twigs across the ceiling vegas near the ladder opening. Smooth clay paste over the sticks to make a weatherproof ceiling.
- Start another one room house on top of the roof of the first. Span the door opening by placing a lintel stick over the door and laying bricks on it. Add vegas and a clay roof as before. Let dry.
Note: This structure will be fragile. Perhaps you can think of ways to strengthen it.
The U.S. National Park Service website on Mesa Verde has an excellent curriculum enrichment section, and adds this about its building cliff houses activity:
- Be creative! Add ladders, pots, food, etc. and you might even decorate the walls as the Ancestral Puebloans did.
- While doing this activity discuss what it would have been like to build a “real” dwelling of the type you are constructing using Ancestral Puebloan technology and tools. What problems do you think they encountered?
- What would have been some advantages and disadvantages of living in a dwelling like the one you are constructing?
Do you have any great ideas, field trips, or personal experience teaching an architecture unit? Leave a comment and tell us about it!
by Talbot Hamlin. A wonderful book showing lots of details about engineering and architecture within the context of history. Many developments changed the history of the world, like the arch or stirrups for saddles. This book tells about the period of history, not just the buildings which were built.
by David Macaulay. A DVD about the building of an imaginary castle, Lord Kevin’s. In 1277 -1305, several castles were built to aid in the conquest of Wales. Lord Kevin’s castle and town is modeled after these actual castles. An interesting tale showing the details of castle building.
by David Macaulay. Verbonia, an imaginary Roman city, is built and populated in this book. Once again, Macaulay creates a ‘real’ pretend city with all the problems and virtues of a Roman town. Many engineering tools and techniques are discussed. This is a good book from which to study the Roman construction methods with younger students.
by James L Adams. Adams looks at several different angles of engineering. Architectural engineering is just one aspect of engineering discussed. Using some of the most famous failures of modern times, Adams goes over the methods designers use to put together design and practicality. A very interesting book for your older students.
by Max Schwartz. Using this reference book will enhance your Scripture study. Schwartz, a civil engineer himself, helps us understand how the ancients built, what they build with, and how well the buildings stood up to the test of time. He includes many drawings and diagrams. The reading level is upper elementary and so the book is easy to understand.
by J. Gardner Bennett. This is an older book, but it has lots of interesting details about the earlier “modern’ building techniques and materials. It is fun to read and also gives the reader the idea that engineering is a praiseworthy occupation.
by Clois E. Kicklighter and Ronald J. Baird. This book is a great chapter-by-chapter systematic study of the planning and building of a house. Residential building is well covered and there are plenty of suggestions for projects like models at the end of each chapter. Many drafting assignments are in this section, too.


 do this would tell your child that his or her ideas are no good, and that building is boring. Just let your child play with the blocks.
 The building materials of the Romans were brick, concrete, stone, and wood. [amazon_link id=”0399300015″ target=”_blank” ]Talbot Hamlin[/amazon_link] describes Roman bricks as 1 or 2 feet square and one to one and one half inch thick, almost a large tile. These must have been fired bricks.

